Pan-Seared Fish Recipe

Pan-Seared Fish Recipe

Pan-seared fish is a quick and healthy way to enjoy tender, flaky fish with a crispy golden crust. This simple recipe works well with a variety of fish, such as salmon, cod, tilapia, or snapper.


Ingredients

  • 2 fillets of fish (skin-on or skinless)
  • 2 tbsp olive oil or butter
  • 1 tsp salt (adjust to taste)
  • 1/2 tsp black pepper
  • 1/2 tsp smoked paprika (optional)
  • 1/4 tsp garlic powder (optional)
  • Lemon wedges (for serving)
  • Fresh herbs (parsley, dill, or thyme)

Instructions

1. Prepare the Fish:

  1. Pat the fish fillets dry with paper towels to ensure a crispy crust.
  2. Season both sides of the fish with salt, pepper, and optional spices like paprika and garlic powder.

2. Heat the Pan:

  1. Heat a large skillet over medium-high heat.
  2. Add olive oil or butter to the pan and swirl it around to coat the surface evenly.

3. Cook the Fish:

  1. Place the fish fillets in the pan, skin-side down if using skin-on fillets. Gently press the fish with a spatula to ensure full contact with the pan.
  2. Cook for 3–4 minutes without moving the fish, until the edges turn golden and the fish releases easily from the pan.
  3. Flip the fillets carefully using a spatula and cook for another 2–3 minutes, or until the fish is opaque and flakes easily with a fork.

4. Serve:

  • Transfer the fish to a plate and squeeze fresh lemon juice over the top.
  • Garnish with fresh herbs for added flavor.

Tips for Success:

  • Choose the Right Pan: A nonstick or stainless steel skillet works best for searing fish.
  • Don’t Overcrowd the Pan: Cook the fillets in batches if necessary to avoid steaming.
  • Avoid Overcooking: Keep an eye on the fish to ensure it remains tender and moist.

Serving Suggestions:

  • Pair with steamed vegetables, a side salad, or rice pilaf for a balanced meal.
  • Serve with a dollop of garlic butter or tartar sauce for extra flavor.

Enjoy this quick and flavorful dish that’s perfect for a weeknight dinner or a casual gathering! 🐟🍋

Read more: Pan-Seared Fish Recipe
French Custard Tart (Tarte à la Crème)

French Custard Tart (Tarte à la Crème)

The French Custard Tart is a classic dessert featuring a buttery, flaky crust filled with a smooth, creamy vanilla custard. This elegant tart is simple yet indulgent, making it perfect for any occasion.


Ingredients

For the Tart Crust (Pâte Sucrée):

  • 1 1/4 cups (160g) all-purpose flour
  • 1/2 cup (115g) unsalted butter, chilled and cubed
  • 1/4 cup (50g) granulated sugar
  • 1 egg yolk
  • 2–3 tbsp cold water

For the Custard Filling:

  • 2 cups (500ml) whole milk
  • 1/2 cup (120ml) heavy cream
  • 1/2 cup (100g) granulated sugar
  • 4 large egg yolks
  • 2 tbsp cornstarch
  • 1 tsp pure vanilla extract
  • A pinch of salt

Instructions

1. Prepare the Tart Crust (Pâte Sucrée):

  1. In a mixing bowl, combine flour and sugar. Add the chilled butter and rub it into the flour with your fingertips or a pastry cutter until the mixture resembles coarse crumbs.
  2. Mix in the egg yolk, then add cold water, one tablespoon at a time, until the dough just comes together.
  3. Form the dough into a disc, wrap it in plastic wrap, and refrigerate for at least 30 minutes.

2. Roll Out the Dough:

  1. Preheat your oven to 375°F (190°C).
  2. On a lightly floured surface, roll out the chilled dough to fit a 9-inch tart pan with a removable bottom.
  3. Press the dough into the tart pan, trimming any excess, and prick the base with a fork.
  4. Line the crust with parchment paper and fill it with pie weights or dried beans. Blind bake for 15 minutes, remove the weights, and bake for another 10 minutes until lightly golden. Set aside to cool.

3. Make the Custard Filling:

  1. In a saucepan, heat the milk, heavy cream, and half of the sugar over medium heat until it just starts to simmer.
  2. In a separate bowl, whisk the egg yolks, remaining sugar, cornstarch, vanilla, and salt until smooth.
  3. Slowly pour the hot milk mixture into the egg yolk mixture, whisking constantly to prevent curdling.
  4. Return the mixture to the saucepan and cook over medium-low heat, stirring continuously, until it thickens and coats the back of a spoon (about 3–5 minutes). Do not boil.

4. Assemble the Tart:

  1. Pour the warm custard into the cooled tart shell and smooth the top with a spatula.
  2. Optional: For a brûléed finish, sprinkle a thin layer of sugar on top of the custard and caramelize it with a kitchen torch or under a broiler.

5. Chill and Serve:

  • Allow the tart to cool to room temperature, then refrigerate for at least 2 hours to set.
  • Slice and serve as is, or garnish with fresh fruit or a dusting of powdered sugar.

Tips for Success:

  • For an extra luxurious tart, use vanilla bean paste or scrape the seeds of a vanilla pod into the milk.
  • To avoid a soggy crust, ensure the tart shell is fully baked and cooled before adding the custard.
  • The custard can also be flavored with citrus zest, almond extract, or a touch of liqueur for variety.

This French Custard Tart is creamy, smooth, and absolutely delightful—a timeless dessert that’s sure to impress! 🥧✨

Royal Bream Fish au Four

Royal Bream Fish au Four (Oven-Baked Royal Bream)

Royal Bream, also known as Dorade Royale, is a flavorful fish with tender, flaky meat. This Mediterranean-inspired oven-baked recipe enhances its natural flavors with fresh herbs, lemon, and olive oil.


Ingredients

  • 2 whole royal bream fish, cleaned and scaled
  • 3 tbsp olive oil
  • 2 garlic cloves, minced
  • 1 lemon, thinly sliced
  • 1 lemon (for juice)
  • 1 tsp paprika
  • 1 tsp cumin powder
  • 1 tsp dried oregano or thyme
  • 1 tsp salt (adjust to taste)
  • 1/2 tsp black pepper
  • Fresh parsley or cilantro, chopped (for garnish)
  • 1 medium onion, thinly sliced
  • 2 medium tomatoes, sliced
  • 1 bell pepper, sliced (optional)

Instructions

1. Preheat the Oven:

  • Preheat your oven to 375°F (190°C).
  • Line a baking dish with parchment paper or lightly grease it with olive oil.

2. Prepare the Marinade:

  1. In a small bowl, mix olive oil, minced garlic, paprika, cumin, oregano, salt, and black pepper.
  2. Add the juice of one lemon and whisk to combine.

3. Season the Fish:

  1. Rinse the fish under cold water and pat them dry with paper towels.
  2. Using a sharp knife, make 2–3 shallow slashes on each side of the fish to allow the marinade to penetrate.
  3. Rub the marinade generously over the entire fish, including inside the cavity.
  4. Place lemon slices inside the cavity for added flavor.

4. Arrange the Vegetables:

  1. In the prepared baking dish, spread the onion slices as a base layer.
  2. Arrange the sliced tomatoes and bell peppers (if using) on top of the onions.
  3. Drizzle a little olive oil and season the vegetables with a pinch of salt and pepper.

5. Bake the Fish:

  1. Place the seasoned fish on top of the vegetables in the baking dish.
  2. Cover the dish with aluminum foil and bake for 20 minutes.
  3. Remove the foil and continue baking for an additional 15–20 minutes, or until the fish is fully cooked and flakes easily with a fork.

6. Garnish and Serve:

  • Once baked, sprinkle the fish with fresh parsley or cilantro.
  • Serve hot with the roasted vegetables, a drizzle of olive oil, and a side of crusty bread or steamed rice.

Tips for Success:

  • Ensure the fish is fresh for the best flavor. Look for clear eyes, shiny skin, and a mild ocean smell.
  • Adjust the seasoning and herbs to your taste. Rosemary or dill can be great alternatives.
  • For added Mediterranean flair, add olives or capers to the vegetable base.

This Royal Bream au Four is an elegant and healthy dish that’s easy to prepare yet feels gourmet—perfect for a weeknight dinner or a special occasion! 🐟🍋

Basbousa (Middle Eastern Semoline Cake)

Basbousa (Middle Eastern Semolina Cake)

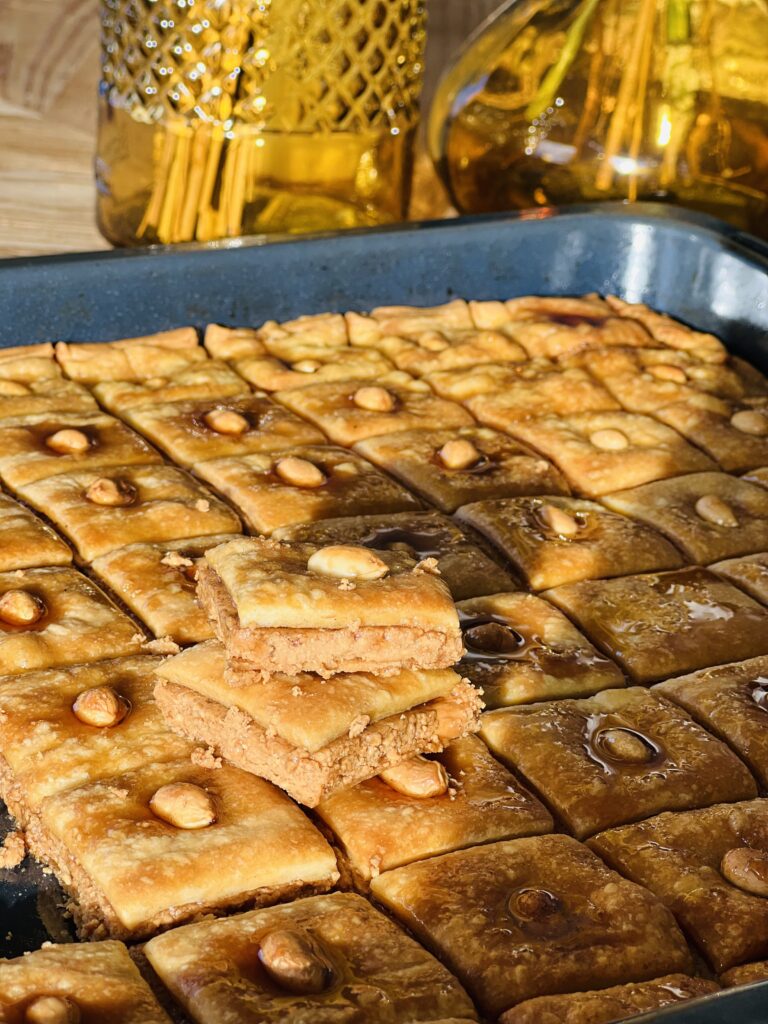
Basbousa is a soft, moist, and aromatic Middle Eastern dessert made with semolina, soaked in sweet syrup. It’s simple to prepare and perfect for any occasion.


Ingredients

For the Cake:

  • 2 cups (320g) semolina (coarse or fine)
  • 1 cup (200g) granulated sugar
  • 1 cup (240g) plain yogurt (or Greek yogurt)
  • 1/2 cup (120ml) melted unsalted butter (or vegetable oil)
  • 1/4 cup (60ml) milk (optional, for adjusting consistency)
  • 1 tsp baking powder
  • 1/4 tsp salt
  • 1 tsp vanilla extract (optional)
  • Almonds or pistachios (for garnish)

For the Syrup:

  • 1 cup (200g) granulated sugar
  • 1 cup (240ml) water
  • 1 tsp lemon juice
  • 1 tsp rose water or orange blossom water (optional, for fragrance)

Instructions

1. Prepare the Syrup:

  1. In a saucepan, combine the sugar, water, and lemon juice. Stir well and bring to a boil over medium heat.
  2. Reduce the heat and simmer for 8–10 minutes until the syrup slightly thickens.
  3. Remove from heat and stir in rose water or orange blossom water, if using. Let the syrup cool completely.

2. Prepare the Cake Batter:

  1. Preheat your oven to 350°F (175°C) and grease a 9×9-inch (or similar size) baking dish with butter or oil.
  2. In a large mixing bowl, combine semolina, sugar, baking powder, and salt. Mix well.
  3. Add yogurt, melted butter, and vanilla extract (if using). Mix until the batter is smooth and thick. If the batter seems too dry, add a little milk to loosen it.
  4. Pour the batter into the prepared baking dish and smooth the top with a spatula.

3. Garnish and Bake:

  1. Using a knife, score the batter into diamond or square shapes (don’t cut all the way through). Place an almond or pistachio in the center of each piece.
  2. Bake in the preheated oven for 30–35 minutes, or until the top is golden brown and a toothpick inserted into the center comes out clean.

4. Add the Syrup:

  1. As soon as the cake is out of the oven, pour the cooled syrup evenly over the hot cake. The syrup will soak into the cake, making it moist and flavorful.
  2. Let the cake cool completely in the pan before slicing along the scored lines.

Tips for Success:

  • For an extra soft texture, let the batter rest for 10–15 minutes before baking to allow the semolina to absorb moisture.
  • Use a light hand when pouring the syrup to ensure it’s evenly distributed without overwhelming the cake.
  • Store leftovers in an airtight container at room temperature for 2–3 days or in the fridge for up to 5 days.

This delicious basbousa is a classic treat that’s wonderfully fragrant and irresistible! 🥄✨

Caramel Apple Upside-Down Cake

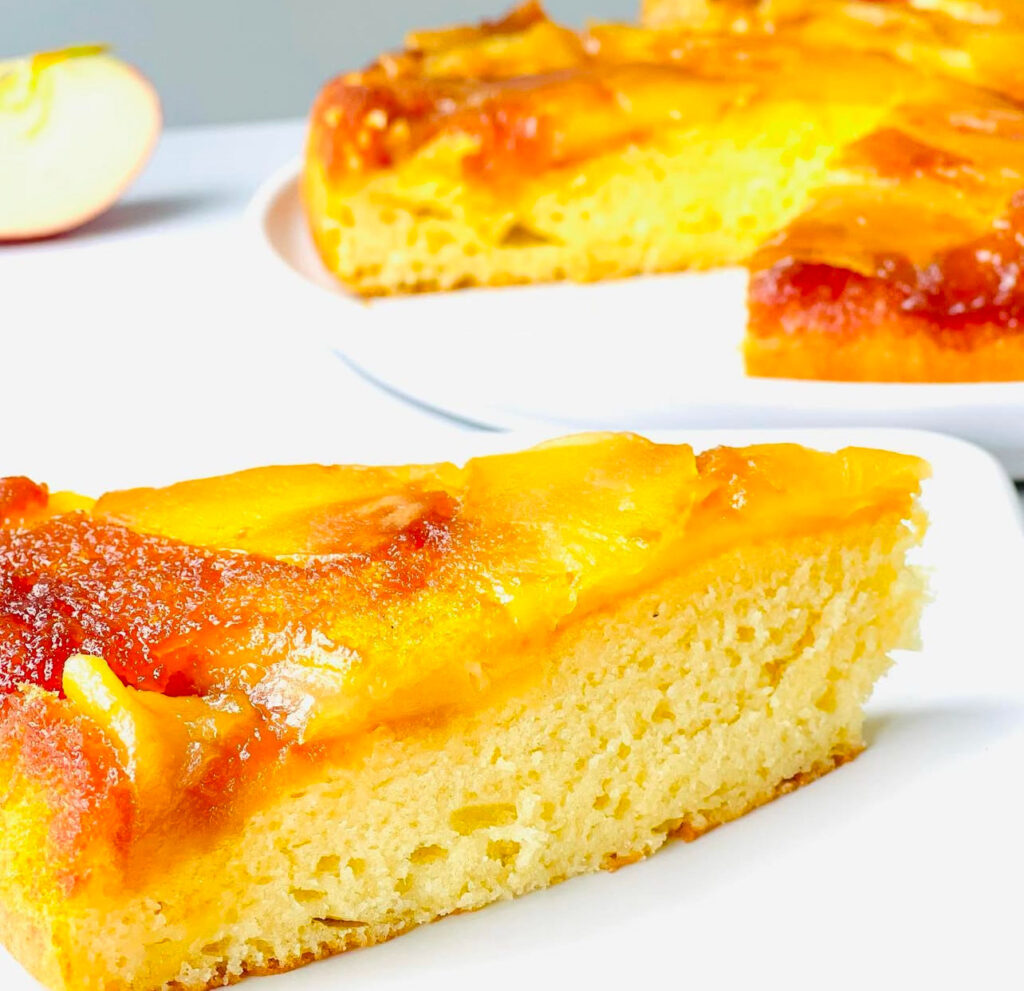
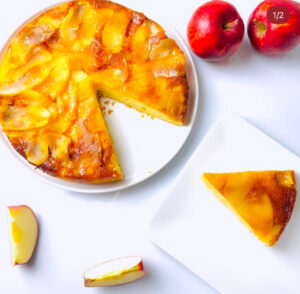
Caramel Apple Upside-Down Cake

This caramel apple upside-down cake is a showstopper dessert that combines tender cake, caramelized apples, and a rich caramel sauce. Perfect for fall or any occasion!


Ingredients

For the Topping:

  • 1/3 cup (75g) unsalted butter
  • 1/2 cup (100g) brown sugar
  • 3 medium apples (e.g., Granny Smith, Honeycrisp), peeled, cored, and thinly sliced

For the Cake Batter:

  • 1 1/2 cups (190g) all-purpose flour
  • 1 1/2 tsp baking powder
  • 1/4 tsp baking soda
  • 1/2 tsp ground cinnamon
  • 1/4 tsp ground nutmeg (optional)
  • 1/4 tsp salt
  • 1/2 cup (115g) unsalted butter, softened
  • 3/4 cup (150g) granulated sugar
  • 2 large eggs
  • 1 tsp vanilla extract
  • 1/2 cup (120ml) whole milk

Instructions

1. Preheat the Oven:

  • Preheat your oven to 350°F (175°C).
  • Grease a 9-inch round cake pan and line the bottom with parchment paper for easy removal.

2. Make the Caramel Topping:

  1. In a small saucepan, melt the butter over medium heat. Stir in the brown sugar until dissolved and bubbly.
  2. Pour the caramel into the prepared cake pan, spreading it evenly across the bottom.
  3. Arrange the apple slices on top of the caramel in a circular pattern, slightly overlapping them.

3. Prepare the Cake Batter:

  1. In a medium bowl, whisk together the flour, baking powder, baking soda, cinnamon, nutmeg (if using), and salt.
  2. In a large bowl, beat the softened butter and granulated sugar with an electric mixer until light and fluffy (about 2–3 minutes).
  3. Add the eggs one at a time, beating well after each addition. Mix in the vanilla extract.
  4. Gradually add the dry ingredients to the wet mixture, alternating with the milk. Start and end with the dry ingredients. Mix until just combined.

4. Assemble and Bake:

  1. Carefully pour the batter over the arranged apples and caramel, spreading it evenly with a spatula.
  2. Bake for 35–40 minutes, or until a toothpick inserted in the center comes out clean.
  3. Let the cake cool in the pan for 5–10 minutes before inverting it onto a serving plate. Gently remove the pan and peel off the parchment paper.

5. Serve:

  • Let the cake cool slightly before slicing. Serve warm or at room temperature with whipped cream or vanilla ice cream for an extra treat.

Tips for Success:

  • Use firm apples like Granny Smith or Honeycrisp for the best texture.
  • If the caramel sticks to the pan, gently heat the bottom of the pan to loosen it before removing.
  • Store leftovers in an airtight container in the fridge for up to 3 days. Reheat slices in the microwave for a warm dessert.

This caramel apple upside-down cake is a comforting, decadent dessert that will have everyone asking for seconds! 🍎✨

Super Easy Vanilla Cupcakes

Super Easy Vanilla Cupcakes

These vanilla cupcakes are fluffy, moist, and incredibly easy to make. They’re perfect for birthdays, parties, or anytime you need a sweet treat.


Ingredients

For the Cupcakes:

  • 1 1/4 cups (160g) all-purpose flour
  • 1 1/2 tsp baking powder
  • 1/4 tsp salt
  • 1/2 cup (115g) unsalted butter, softened
  • 3/4 cup (150g) granulated sugar
  • 2 large eggs, room temperature
  • 2 tsp vanilla extract
  • 1/2 cup (120ml) whole milk, room temperature

For the Buttercream Frosting:

  • 1/2 cup (115g) unsalted butter, softened
  • 2 cups (250g) powdered sugar
  • 2 tbsp heavy cream or milk
  • 1 tsp vanilla extract
  • Food coloring (optional)

Instructions

1. Preheat the Oven:

  1. Preheat your oven to 350°F (175°C).
  2. Line a 12-cup muffin tin with cupcake liners.

2. Make the Cupcake Batter:

  1. In a medium bowl, whisk together the flour, baking powder, and salt. Set aside.
  2. In a large bowl, beat the butter and sugar together with an electric mixer until light and fluffy (about 2–3 minutes).
  3. Add the eggs one at a time, beating well after each addition. Mix in the vanilla extract.
  4. Gradually add the dry ingredients to the wet ingredients, alternating with the milk, beginning and ending with the dry ingredients. Mix until just combined. Do not overmix.

3. Bake the Cupcakes:

  1. Divide the batter evenly among the cupcake liners, filling each about 2/3 full.
  2. Bake for 18–22 minutes, or until a toothpick inserted into the center comes out clean.
  3. Remove the cupcakes from the oven and let them cool in the pan for 5 minutes before transferring to a wire rack to cool completely.

4. Make the Buttercream Frosting:

  1. In a large bowl, beat the butter with an electric mixer until creamy.
  2. Gradually add the powdered sugar, one cup at a time, mixing well after each addition.
  3. Add the heavy cream and vanilla extract. Beat on high speed for 2–3 minutes, until the frosting is fluffy. If desired, add food coloring.

5. Decorate the Cupcakes:

  1. Once the cupcakes are completely cool, pipe or spread the frosting on top.
  2. Add sprinkles, fruits, or other decorations if desired.

Tips for Success:

  • Make sure all ingredients are at room temperature for a smooth batter.
  • Don’t overmix the batter to keep the cupcakes soft and fluffy.
  • Store the cupcakes in an airtight container at room temperature for up to 2 days or in the fridge for up to 5 days.

These super easy vanilla cupcakes are classic, delicious, and guaranteed to be a hit! 🧁✨

Easy French Crepes

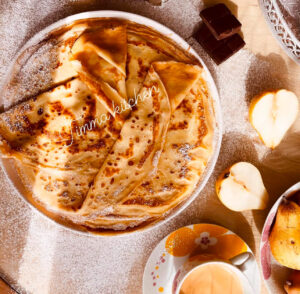
Easy French Crêpes Recipe

French crêpes are thin, delicate pancakes that can be enjoyed sweet or savory. This simple recipe is perfect for breakfast, brunch, or dessert.


Ingredients

For the Crêpe Batter:

  • 1 cup (125g) all-purpose flour
  • 2 large eggs
  • 1 1/2 cups (360ml) milk
  • 1 tbsp granulated sugar (optional, for sweet crêpes)
  • 1/4 tsp salt
  • 1 tsp vanilla extract (optional, for sweet crêpes)
  • 2 tbsp melted butter (plus extra for greasing the pan)

For Serving (Optional):

  • Fresh fruits (berries, bananas, etc.)
  • Nutella, jam, or honey
  • Powdered sugar
  • Whipped cream

Instructions

1. Prepare the Batter:

  1. In a large mixing bowl, whisk together the flour, sugar (if using), and salt.
  2. Add the eggs and whisk until a thick paste forms.
  3. Gradually add the milk while whisking to avoid lumps. Mix until the batter is smooth and runny.
  4. Stir in the vanilla extract (if using) and melted butter.
  5. Let the batter rest for 20–30 minutes to allow the flour to hydrate for more tender crêpes.

2. Heat the Pan:

  1. Heat a non-stick skillet or crêpe pan over medium heat.
  2. Lightly grease the pan with a small amount of butter or oil.

3. Cook the Crêpes:

  1. Pour a small ladleful of batter (about 1/4 cup) into the center of the pan. Swirl the pan quickly to spread the batter into a thin, even layer.
  2. Cook for 1–2 minutes until the edges start to lift and the bottom is golden brown.
  3. Flip the crêpe using a spatula and cook for another 30 seconds to 1 minute.
  4. Transfer the cooked crêpe to a plate and cover with a clean kitchen towel to keep warm. Repeat with the remaining batter.

4. Serve:

  • Stack the crêpes and serve with your favorite toppings: fresh fruits, Nutella, powdered sugar, or a drizzle of honey.

Tips for Perfect Crêpes:

  • For thinner crêpes, add a little more milk to the batter.
  • Use a non-stick pan for easy flipping.
  • Keep the heat medium to prevent burning. Adjust the heat as needed during cooking.
  • Leftover crêpes can be stored in the fridge for up to 2 days or frozen for longer storage.

Enjoy these delicate and versatile crêpes, perfect for any time of day! 🥞✨

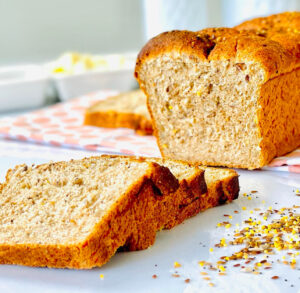
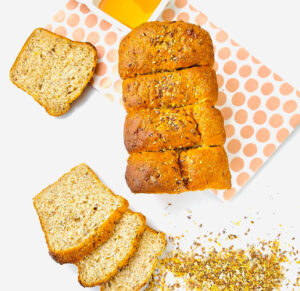
Cereal Bread

Cereal Bread Recipe

This cereal bread is hearty, wholesome, and perfect for breakfast or a midday snack. Packed with fiber and a medley of grains, it’s a great addition to a healthy diet.


Ingredients

For the Bread Dough:

    • 3 cups (375g) all-purpose flour or bread flour
    • 1 cup (100g) mixed cereals (oats, millet, flaxseeds, sunflower seeds, etc.)
    • 1 1/2 tsp salt


  • 2 tbsp honey or maple syrup
  • 2 tsp active dry yeast
  • 1 cup (240ml) warm water (110°F/45°C)
  • 1/3 cup (80ml) warm milk
  • 2 tbsp olive oil or melted butter


For the Topping (Optional):

  • 2 tbsp mixed cereals
  • 1 egg, beaten (for egg wash)

Instructions

1. Prepare the Dough:

  1. In a small bowl, dissolve the yeast and honey in warm water. Let it sit for 5–10 minutes until foamy.
  2. In a large mixing bowl, combine the flour, cereals, and salt.
  3. Add the yeast mixture, warm milk, and olive oil to the dry ingredients. Mix until a dough forms.
  4. Knead the dough on a floured surface for about 8–10 minutes, or until it becomes smooth and elastic. (Alternatively, use a stand mixer with a dough hook for 5–6 minutes.)

2. First Rise:

  1. Place the dough in a greased bowl, cover with a clean kitchen towel, and let it rise in a warm place for 1–1.5 hours, or until doubled in size.

3. Shape the Bread:

  1. Punch down the dough to release the air.
  2. Shape the dough into a loaf or rounds and place it in a greased loaf pan or on a baking sheet.
  3. Brush the top with the beaten egg and sprinkle with mixed cereals for decoration, if desired.

4. Second Rise:

  1. Cover the shaped dough and let it rise again for 30–40 minutes, or until it puffs up.

5. Bake the Bread:

  1. Preheat the oven to 375°F (190°C).
  2. Bake the bread for 30–35 minutes, or until the top is golden brown and the bread sounds hollow when tapped on the bottom.
  3. Let it cool completely on a wire rack before slicing.

Tips for Success:

  • Use your favorite mix of cereals to customize the flavor and texture. Common options include rolled oats, chia seeds, sesame seeds, or quinoa.
  • For extra softness, use whole milk instead of water.
  • To store, keep the bread in an airtight container at room temperature for up to 3 days or freeze for up to 2 months.

This cereal bread is hearty, nutritious, and versatile—perfect for sandwiches or toasting with a slather of butter and jam. 🥖✨