Pan-Seared Fish Recipe

Pan-Seared Fish Recipe

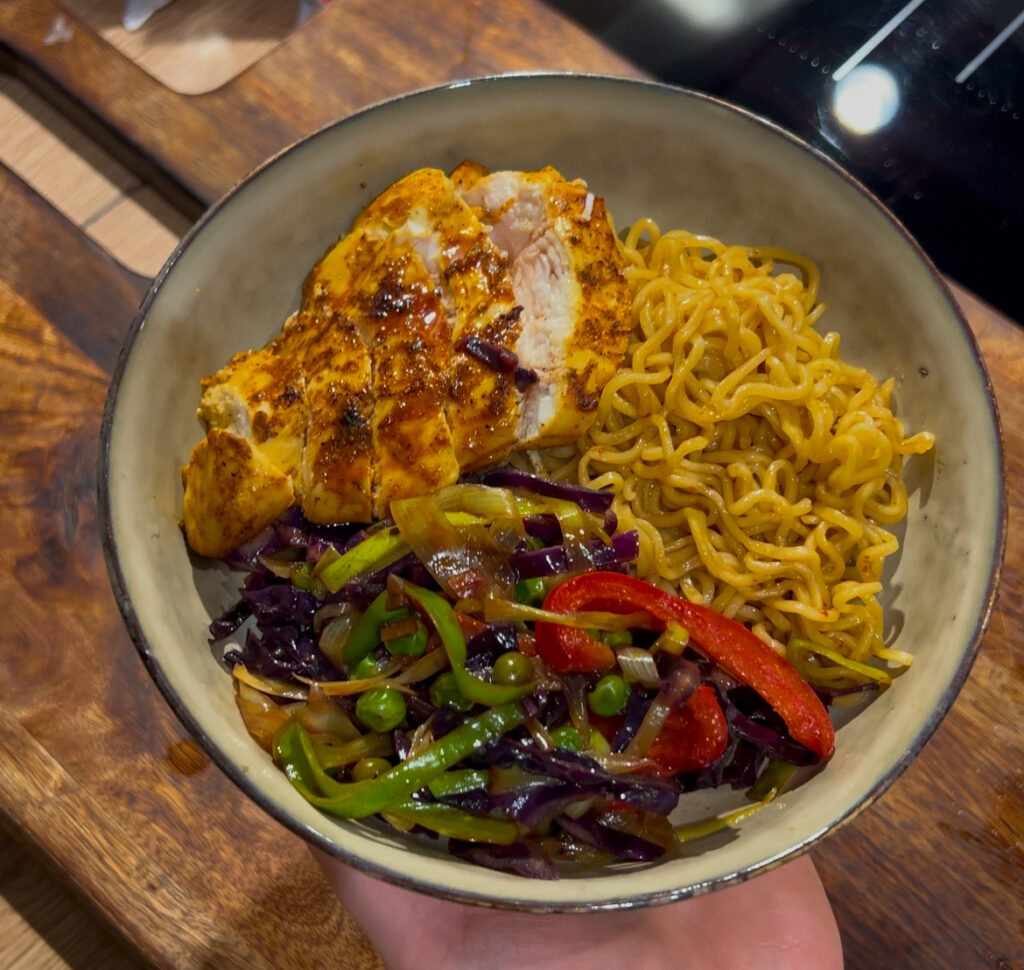
Pan-seared fish is a quick and healthy way to enjoy tender, flaky fish with a crispy golden crust. This simple recipe works well with a variety of fish, such as salmon, cod, tilapia, or snapper.


Ingredients

  • 2 fillets of fish (skin-on or skinless)
  • 2 tbsp olive oil or butter
  • 1 tsp salt (adjust to taste)
  • 1/2 tsp black pepper
  • 1/2 tsp smoked paprika (optional)
  • 1/4 tsp garlic powder (optional)
  • Lemon wedges (for serving)
  • Fresh herbs (parsley, dill, or thyme)

Instructions

1. Prepare the Fish:

  1. Pat the fish fillets dry with paper towels to ensure a crispy crust.
  2. Season both sides of the fish with salt, pepper, and optional spices like paprika and garlic powder.

2. Heat the Pan:

  1. Heat a large skillet over medium-high heat.
  2. Add olive oil or butter to the pan and swirl it around to coat the surface evenly.

3. Cook the Fish:

  1. Place the fish fillets in the pan, skin-side down if using skin-on fillets. Gently press the fish with a spatula to ensure full contact with the pan.
  2. Cook for 3–4 minutes without moving the fish, until the edges turn golden and the fish releases easily from the pan.
  3. Flip the fillets carefully using a spatula and cook for another 2–3 minutes, or until the fish is opaque and flakes easily with a fork.

4. Serve:

  • Transfer the fish to a plate and squeeze fresh lemon juice over the top.
  • Garnish with fresh herbs for added flavor.

Tips for Success:

  • Choose the Right Pan: A nonstick or stainless steel skillet works best for searing fish.
  • Don’t Overcrowd the Pan: Cook the fillets in batches if necessary to avoid steaming.
  • Avoid Overcooking: Keep an eye on the fish to ensure it remains tender and moist.

Serving Suggestions:

  • Pair with steamed vegetables, a side salad, or rice pilaf for a balanced meal.
  • Serve with a dollop of garlic butter or tartar sauce for extra flavor.

Enjoy this quick and flavorful dish that’s perfect for a weeknight dinner or a casual gathering! 🐟🍋

Read more: Pan-Seared Fish Recipe

Moroccan Seafood Pastilla

Moroccan Seafood Pastilla Recipe

Moroccan seafood pastilla (or bastilla) is a decadent dish that combines layers of crispy, flaky pastry with a rich, savory filling of seafood and aromatic spices. A showstopper for special occasions! 🥮🦐🐟


Ingredients

For the Filling:

  • 500g (1 lb) shrimp (peeled and deveined)
  • 300g (10 oz) white fish fillet (e.g., cod or halibut), cut into small pieces
  • 300g (10 oz) squid or calamari, cleaned and chopped
  • 1 medium onion (finely chopped)
  • 3 tbsp olive oil
  • 3 garlic cloves (minced)
  • 1 tsp ground paprika
  • 1/2 tsp ground cumin
  • 1/4 tsp cayenne pepper (optional)
  • 1 tsp turmeric
  • 1/4 cup (60ml) fresh parsley (chopped)
  • 1/4 cup (60ml) fresh cilantro (chopped)
  • Salt and pepper (to taste)

For the Sauce:

  • 1 cup (240ml) fish stock (or water)
  • 1/2 cup (120ml) heavy cream
  • 2 tbsp butter
  • 2 tbsp all-purpose flour

For the Pastilla Layers:

  • 8–10 sheets of phyllo dough (or warqa if available)
  • 1/4 cup (60g) melted butter (for brushing)

For Garnish:

  • Sliced almonds (toasted)
  • Powdered sugar and ground cinnamon (optional, for a sweet touch)

Instructions

1. Prepare the Seafood Filling:

  1. Heat olive oil in a large skillet over medium heat. Add the onions and garlic, and sauté until softened and fragrant.
  2. Add the shrimp, fish, and squid. Cook for 5–7 minutes until the seafood is just cooked.
  3. Stir in paprika, cumin, turmeric, cayenne (if using), parsley, and cilantro. Season with salt and pepper. Remove from heat and let the filling cool slightly.

2. Make the Sauce:

  1. In a saucepan, melt butter over medium heat. Stir in the flour and cook for 1–2 minutes to form a roux.
  2. Gradually whisk in the fish stock and heavy cream, cooking until the sauce thickens.
  3. Mix the sauce into the cooled seafood mixture. Set aside.

3. Assemble the Pastilla:

  1. Preheat the oven to 375°F (190°C).
  2. Grease a round baking dish or springform pan.
  3. Lay a sheet of phyllo dough (or warqa) in the dish, letting the edges hang over the sides. Brush with melted butter. Repeat with 4–5 more sheets, layering and buttering each one.
  4. Spread the seafood filling evenly over the dough. Fold the overhanging dough over the filling, brushing with butter as you go.
  5. Cover the top with additional phyllo sheets, tucking in the edges and brushing with butter.

4. Bake the Pastilla:

  1. Place the pastilla in the oven and bake for 25–30 minutes, or until golden and crisp.
  2. Let it cool for a few minutes before removing it from the pan.

5. Garnish and Serve:

  • Sprinkle with toasted almonds.
  • For a traditional Moroccan touch, dust the top with powdered sugar and cinnamon for a mix of sweet and savory flavors.

Tips:

  • Warqa Alternative: If using warqa (traditional Moroccan pastry), follow the same assembly steps.
  • Make Ahead: The seafood filling can be prepared a day ahead and stored in the refrigerator.
  • Serving Suggestion: Pair the pastilla with a fresh green salad or Moroccan mint tea.

Enjoy your Moroccan seafood pastilla—a dish that’s crispy, creamy, and bursting with flavor! 🦐🥮

Easy Closed Burger

Easy Closed Burger Recipe

This simple and delicious closed burger is perfect for a quick meal. Juicy patties, fresh toppings, and a soft bun make it irresistible! 🍔


Ingredients:

For the Burger Patties:

  • 500g ground beef (80/20 lean-to-fat ratio for juicy burgers)
  • 1/2 tsp salt
  • 1/2 tsp black pepper
  • 1 tsp garlic powder
  • 1 tsp onion powder
  • 1 tbsp Worcestershire sauce (optional)

For the Toppings:

  • 4 slices of cheddar cheese
  • Lettuce leaves
  • Tomato slices
  • Onion slices (raw or caramelized)
  • Pickles (optional)

For the Sauce (optional):

  • 3 tbsp mayonnaise
  • 1 tbsp ketchup
  • 1 tsp mustard

Other Ingredients:

  • 4 burger buns (soft and fresh)
  • 1 tbsp butter or oil for cooking

Instructions:

1. Prepare the Patties:

  • In a bowl, combine the ground beef, salt, black pepper, garlic powder, onion powder, and Worcestershire sauce (if using). Mix gently until just combined; avoid overmixing to keep the patties tender.
  • Divide the mixture into 4 equal portions and shape them into round patties slightly larger than the burger buns (they will shrink while cooking).

2. Cook the Patties:

  • Heat a skillet or grill pan over medium-high heat. Add a little butter or oil.
  • Place the patties on the hot skillet and cook for 3–4 minutes on each side for medium doneness, or longer if you prefer well-done.
  • During the last minute of cooking, place a slice of cheese on each patty and cover the pan with a lid to melt the cheese.

3. Toast the Buns:

  • Slice the burger buns in half and lightly toast them in a dry pan or on the grill for about 1–2 minutes until golden and warm.

4. Assemble the Burgers:

  • Spread the sauce (if using) on the bottom half of the bun.
  • Layer with lettuce, a cheese-topped patty, tomato slices, onion slices, and pickles.
  • Add the top half of the bun to close the burger.

5. Serve:

  • Serve the closed burgers immediately with your favorite side dishes like fries, coleslaw, or a fresh salad.

Tips:

  • Customize the Toppings: Add bacon, avocado, or even a fried egg for a gourmet twist.
  • Make It Healthier: Use whole-grain buns and substitute beef with turkey or plant-based patties.
  • Meal Prep: Shape the patties in advance and freeze them for quick meals later.

Enjoy your easy and mouthwatering closed burger! 🍔✨

Vegetarian Quiche recipe

Vegetarian Quiche Recipe

This vegetarian quiche is packed with fresh vegetables, creamy custard, and cheesy goodness in a buttery crust. Perfect for breakfast, brunch, or a light dinner!


Ingredients:

For the Crust:

  • 1 1/4 cups (160g) all-purpose flour
  • 1/2 cup (115g) cold unsalted butter, cubed
  • 1/4 tsp salt
  • 3–4 tbsp cold water

For the Filling:

  • 1 tbsp olive oil
  • 1 small onion, finely chopped
  • 2 cups (200g) mixed vegetables (e.g., bell peppers, spinach, mushrooms, zucchini)
  • 1/2 cup (60g) shredded cheddar cheese or Gruyere cheese
  • 4 large eggs
  • 1 cup (240ml) heavy cream or milk (or a mix of both)
  • 1/4 tsp salt
  • 1/4 tsp black pepper
  • 1/4 tsp ground nutmeg (optional)

Instructions:

1. Prepare the Crust:

  • In a large bowl, combine the flour and salt. Add the cold butter and use a pastry cutter or your fingers to work the butter into the flour until the mixture resembles coarse crumbs.
  • Gradually add the cold water, one tablespoon at a time, mixing until the dough comes together. Shape it into a disk, wrap it in plastic wrap, and chill for at least 30 minutes.
  • Preheat your oven to 375°F (190°C). Roll out the chilled dough on a lightly floured surface to fit a 9-inch (23cm) tart pan or pie dish. Press the dough into the pan and trim the edges. Prick the bottom with a fork.
  • Line the crust with parchment paper and fill with pie weights or dried beans. Bake for 10 minutes, then remove the weights and bake for another 5 minutes. Set aside to cool slightly.

2. Prepare the Filling:

  • Heat the olive oil in a skillet over medium heat. Add the chopped onion and cook until soft and translucent, about 3 minutes.
  • Add the mixed vegetables and cook until tender, about 5–7 minutes. Remove from heat and set aside to cool.

3. Make the Custard:

  • In a mixing bowl, whisk together the eggs, cream/milk, salt, pepper, and nutmeg (if using).

4. Assemble the Quiche:

  • Sprinkle half of the shredded cheese over the bottom of the pre-baked crust.
  • Evenly distribute the cooked vegetables over the cheese.
  • Pour the custard mixture over the vegetables, then sprinkle the remaining cheese on top.

5. Bake the Quiche:

  • Place the quiche in the preheated oven and bake for 30–35 minutes, or until the custard is set and the top is lightly golden. The center should jiggle slightly when shaken but not be liquid.

6. Cool and Serve:

  • Allow the quiche to cool for at least 10 minutes before slicing. Serve warm or at room temperature.

Tips:

  • Vegetable Options: Use your favorite vegetables, such as asparagus, broccoli, or roasted cherry tomatoes.
  • Cheese Variations: Try feta, goat cheese, or mozzarella for a different flavor.
  • Make Ahead: The crust can be made and chilled up to a day in advance, and the quiche can be stored in the fridge for up to 3 days.

Enjoy this versatile and delicious vegetarian quiche with a side salad or on its own! 🥧✨